Content Modelling
Model your custom data
If you’re on our Pro plan, you can make your own content model. This guide shows you how to set it up with Storipress.
The basics
Each content type has parts that say what kind of information goes in the story, like a title, the main text, and pictures. This makes your content neat and modular.
Making a content model is really important to make a strong, easy-to-use, and lasting blog that works well for everyone on your team, from the people who write stories to the designers and the coders. It's a good idea to talk with your team about what they need and plan your content that way.
Architecting your content model
With Storipress, you can make a content model that's just right for your publication. You can set it up using our web app, thinking about how you want it to look and work. You can add more fields if your articles need extra info.
Making plans in Storipress is different from traditional database architecting. In Storipress, you start with the big picture and then go to the details, unlike the usual way where you start with details. This helps you think about how it will look right from the start.
Start with the big questions:
- What does your blog need to do, and
- What information should your readers see?
Answering these questions will help you make a good content model. Remember, your model is made of different content types, each like a blog piece. You need to think about where one piece ends and another starts.
When you're making different content types for your blog, think about how you organize it. If it's something simple like a page about your brand, use one type with all the info like name, location, and logo.
But if you're making things where you need to add different stuff each time, like stories with pictures or videos, you should have separate types. One type for stories with hero photos and another for ones with videos. That way, you can choose what you need for each story.
Also, if you have something you use a lot, like a sponsor's name and info, make a piece you can use repeatedly. This makes writing your stories easier. An example is a sponsorship block. Instead of typing out a sponsor name and biography blurb into each article, you can create a reusable chunk of content containing the sponsor’s info that can be used repeatedly. Content reuse can significantly simplify your content creation workflow.
Assembling your content model
Now you know how to set up your content model, you can start making your model in Storipress. You can do this in our web app.
When to make different publications in Storipress:
To build your content model in Storipress, log into the web app and create a publication. Each publication is a separate database and includes unique content types, entries, assets, user memberships, and API keys. Usually, it's best to keep all content in one publication, but multiple publications can be used if needed:
When to use multiple publications:
- Make a new publication for different projects, like client work.
- Create a "playground" to test new ideas with fake stories when first experimenting with Storipress.
- Make publications for stories in different languages (i18n)
When NOT to use multiple publications:
- Don't make new ones just to manage who can publish stories (permissions).
- Don't make lots for testing - use the Content API for that.
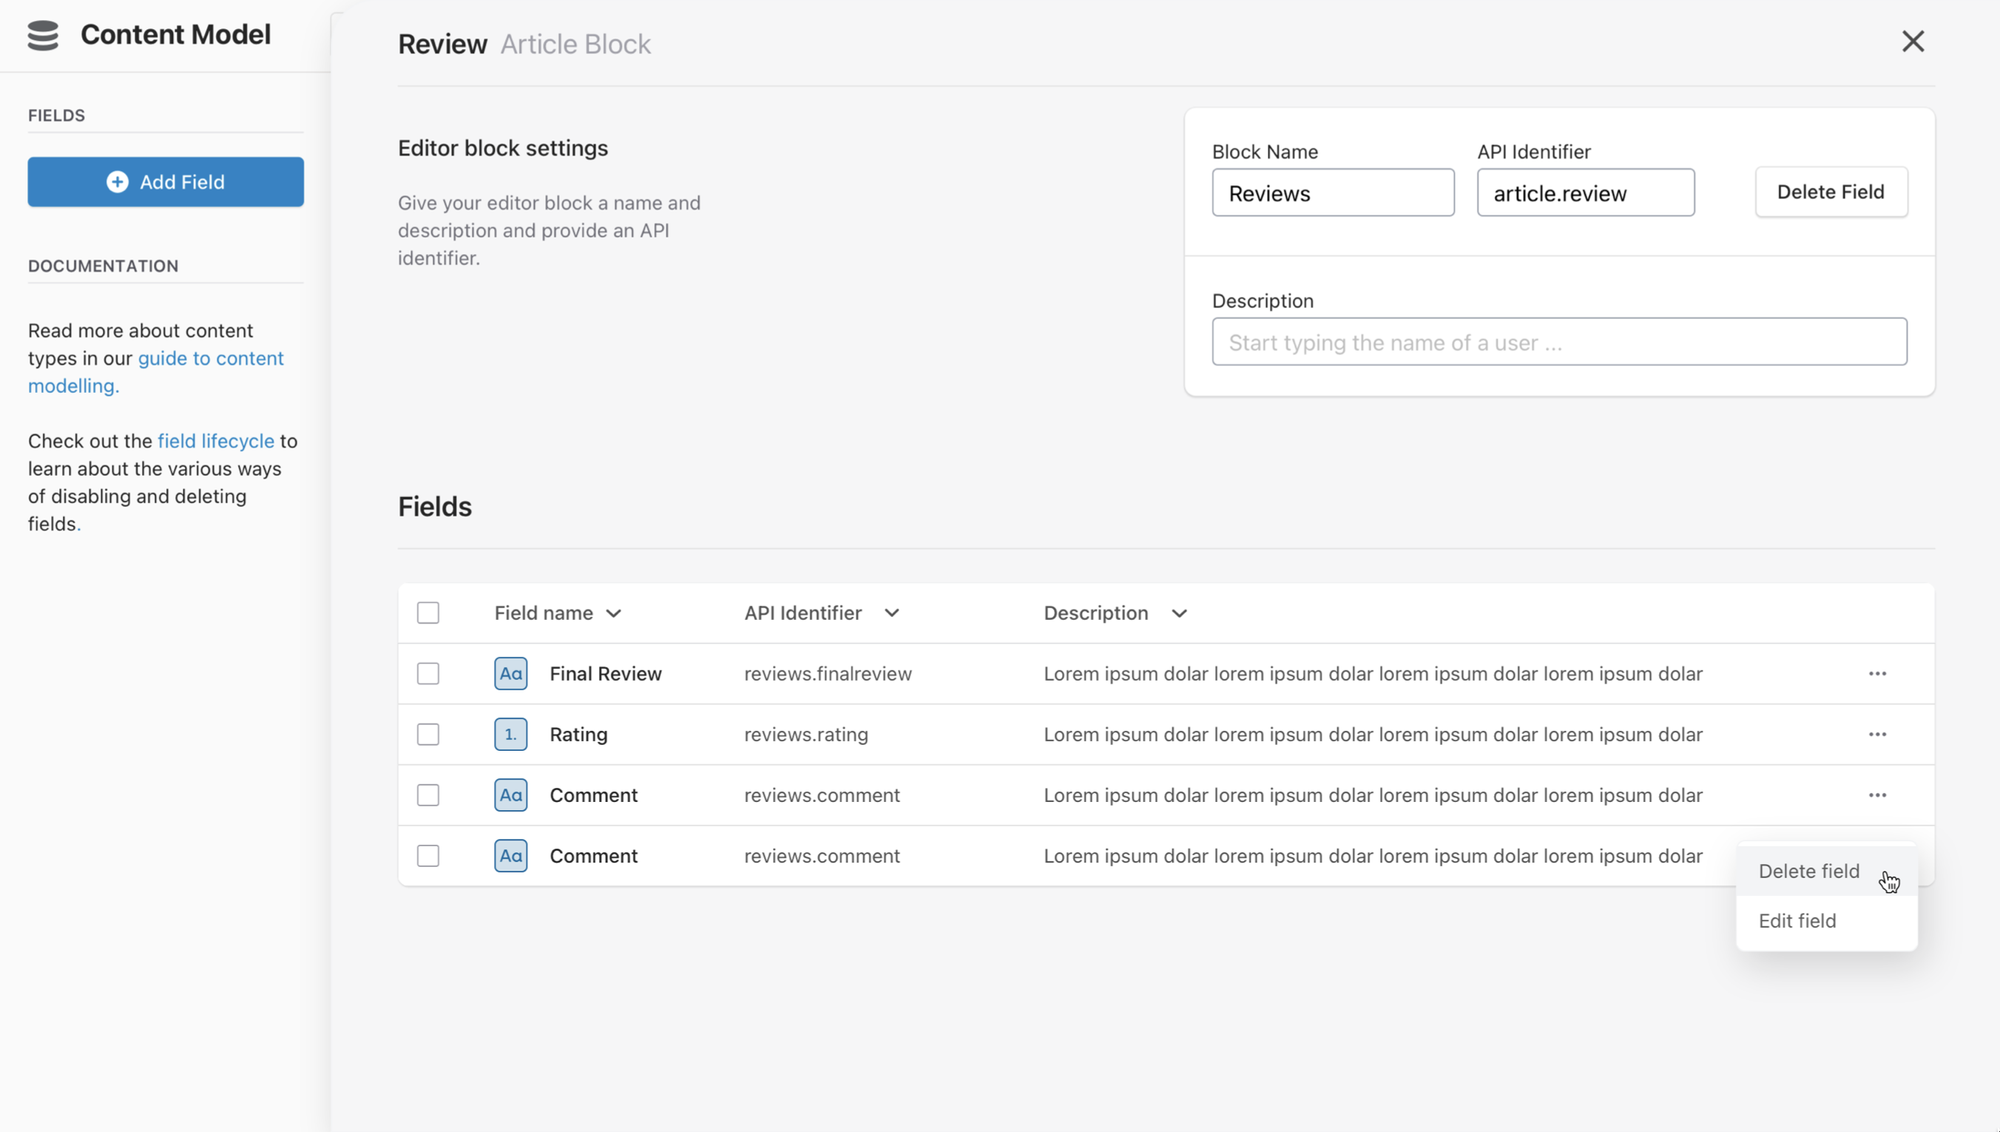
Field settings & validations
Each part of your story in Storipress, like text or pictures, has its own settings. You can change these later, but not the main type or ID.
Validations
In the validations section of your field's settings, you can decide what must be there. For example, if a story needs a review, you can make sure it always gets a rating by marking it as required.
You can make rules for different kinds of fields, like how many letters to use or certain answers you want. If you're linking to other stuff, you can use reference fields to say what kind of things can be linked. This is important for pictures and videos, too – you wouldn't want to put a video where an image should be accidentally!
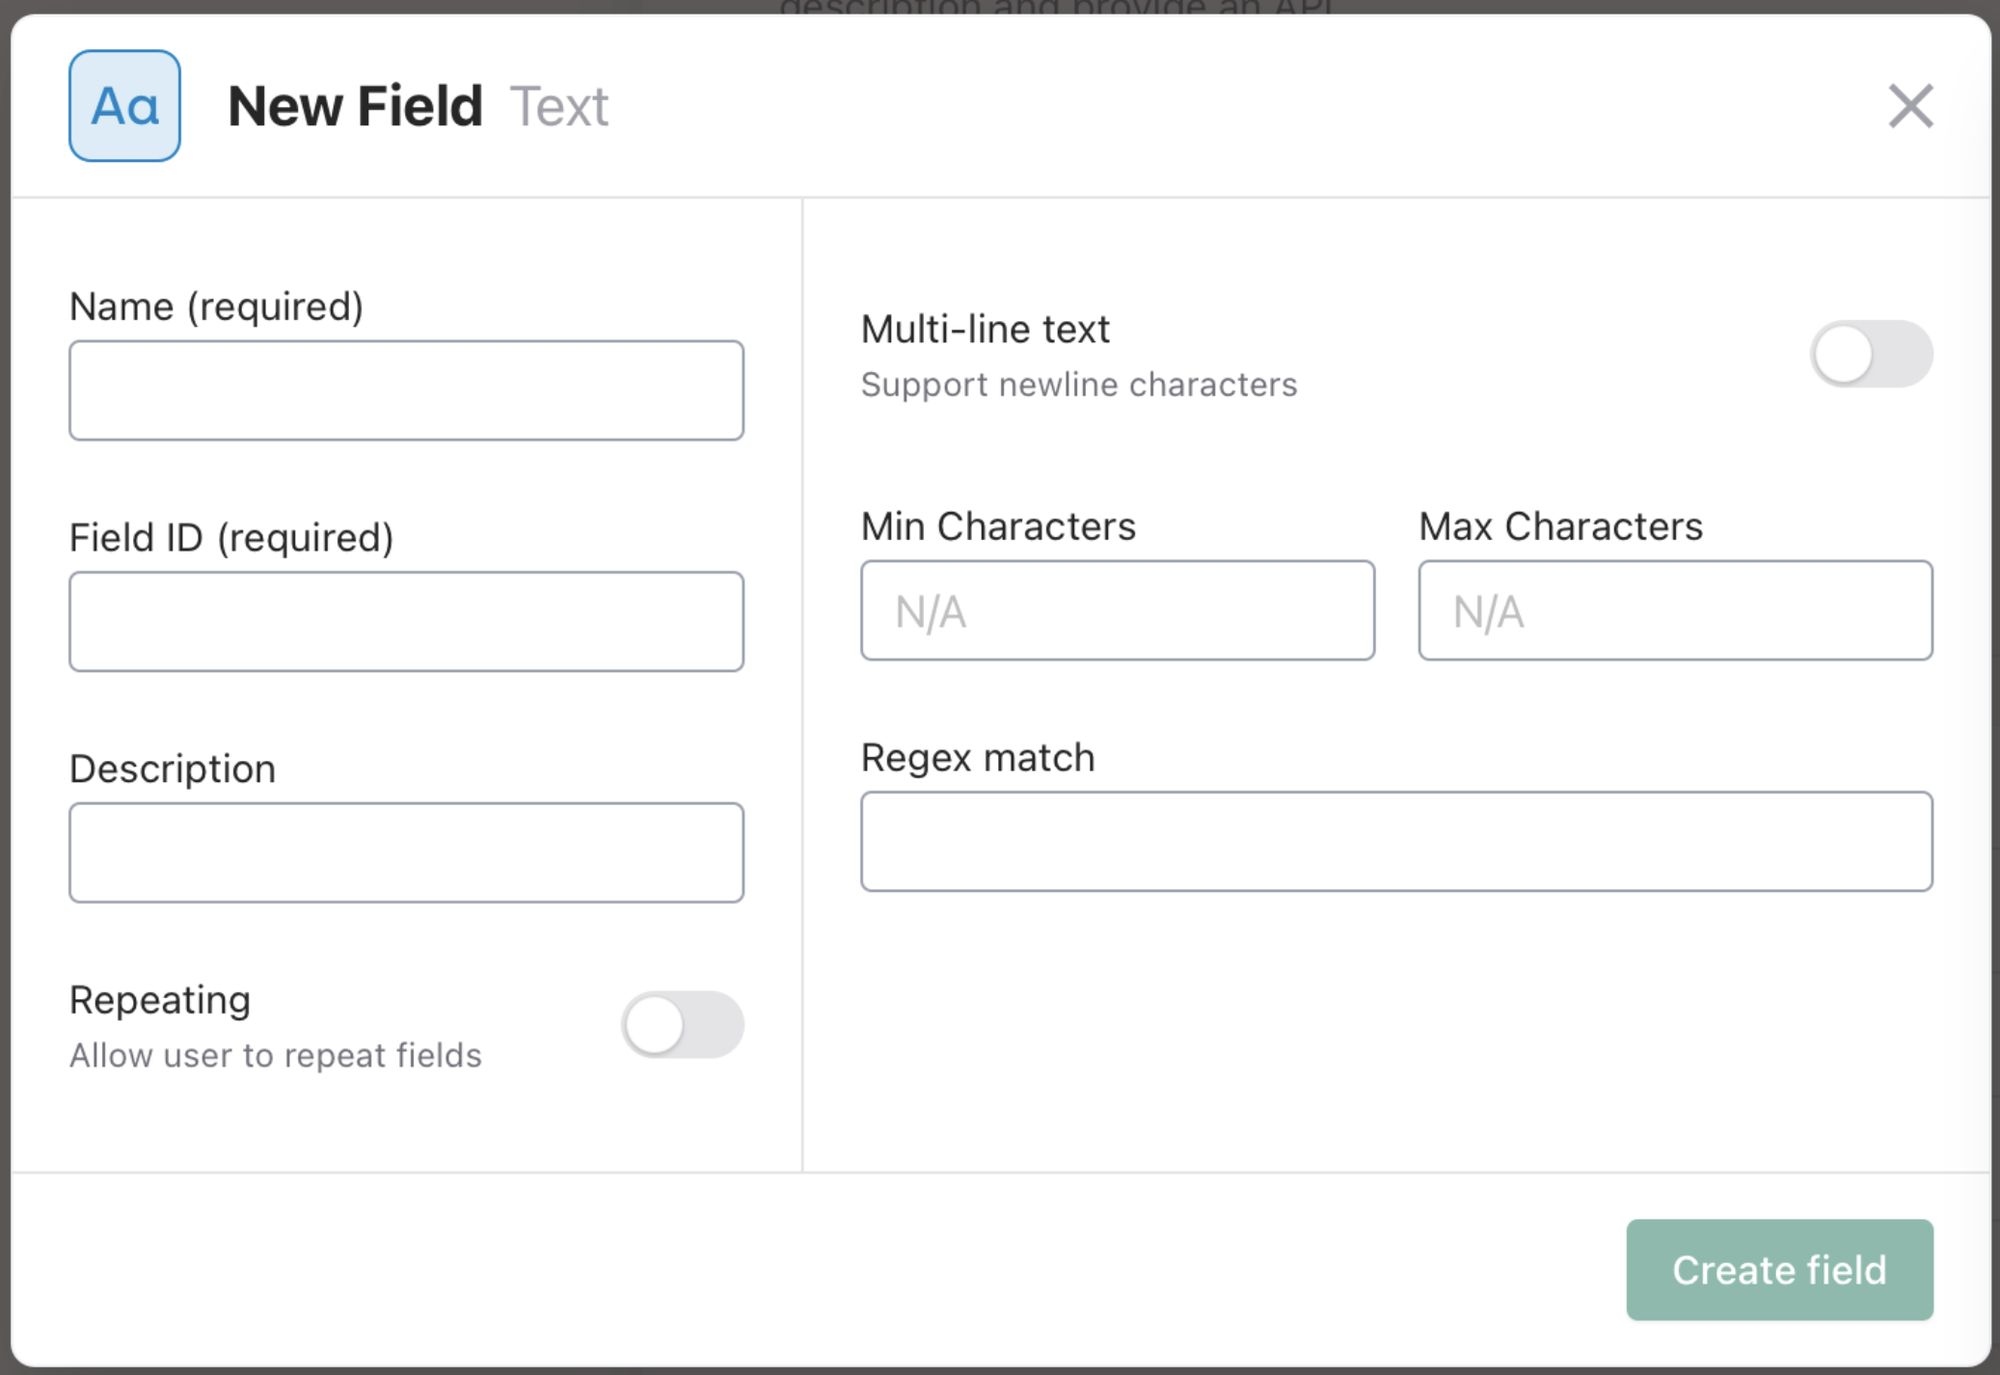
We suggest setting up all your content types of content before adding validations.
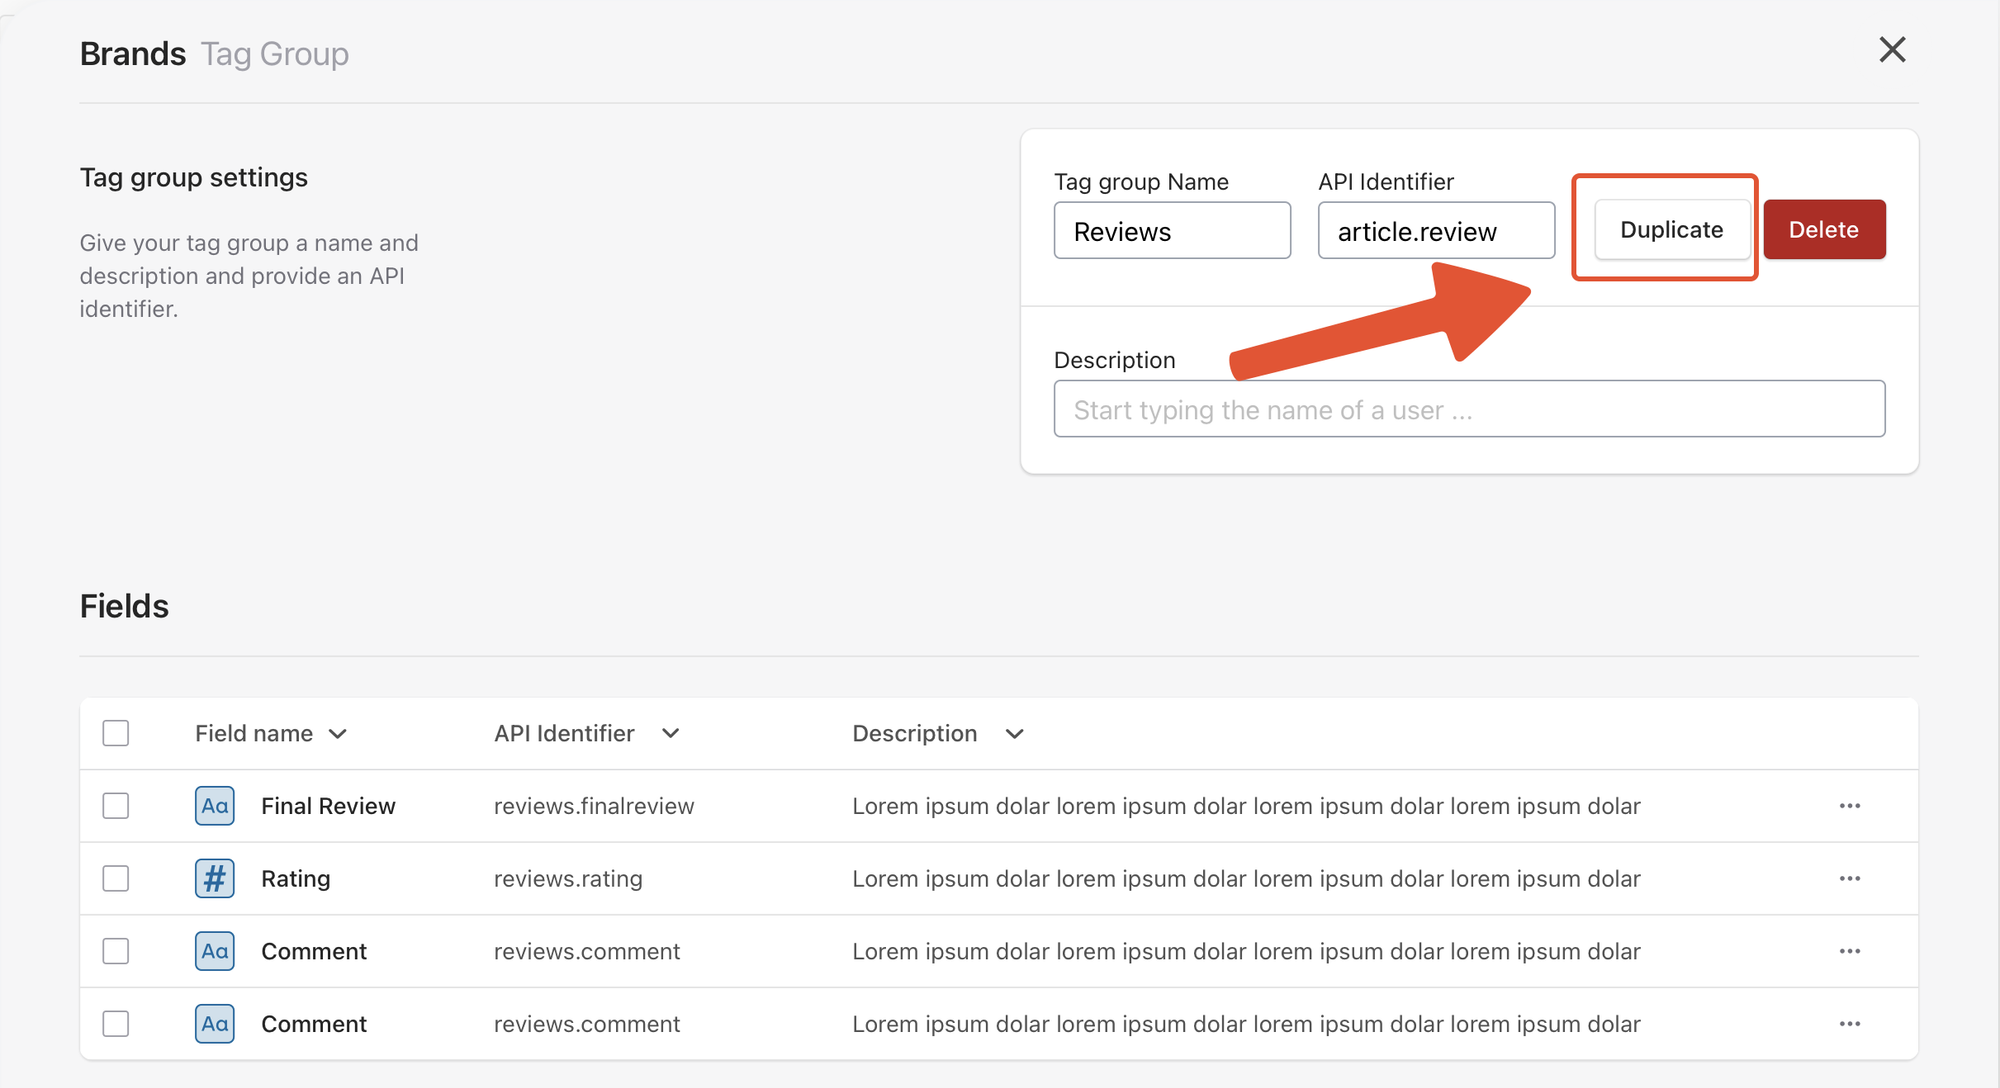
Copying & removing content types
To change a type of content without messing up the current model, make a copy in the web app's settings.
Before you delete the old type of content, you need to delete everything that uses it to make sure it doesn't affect your live application.
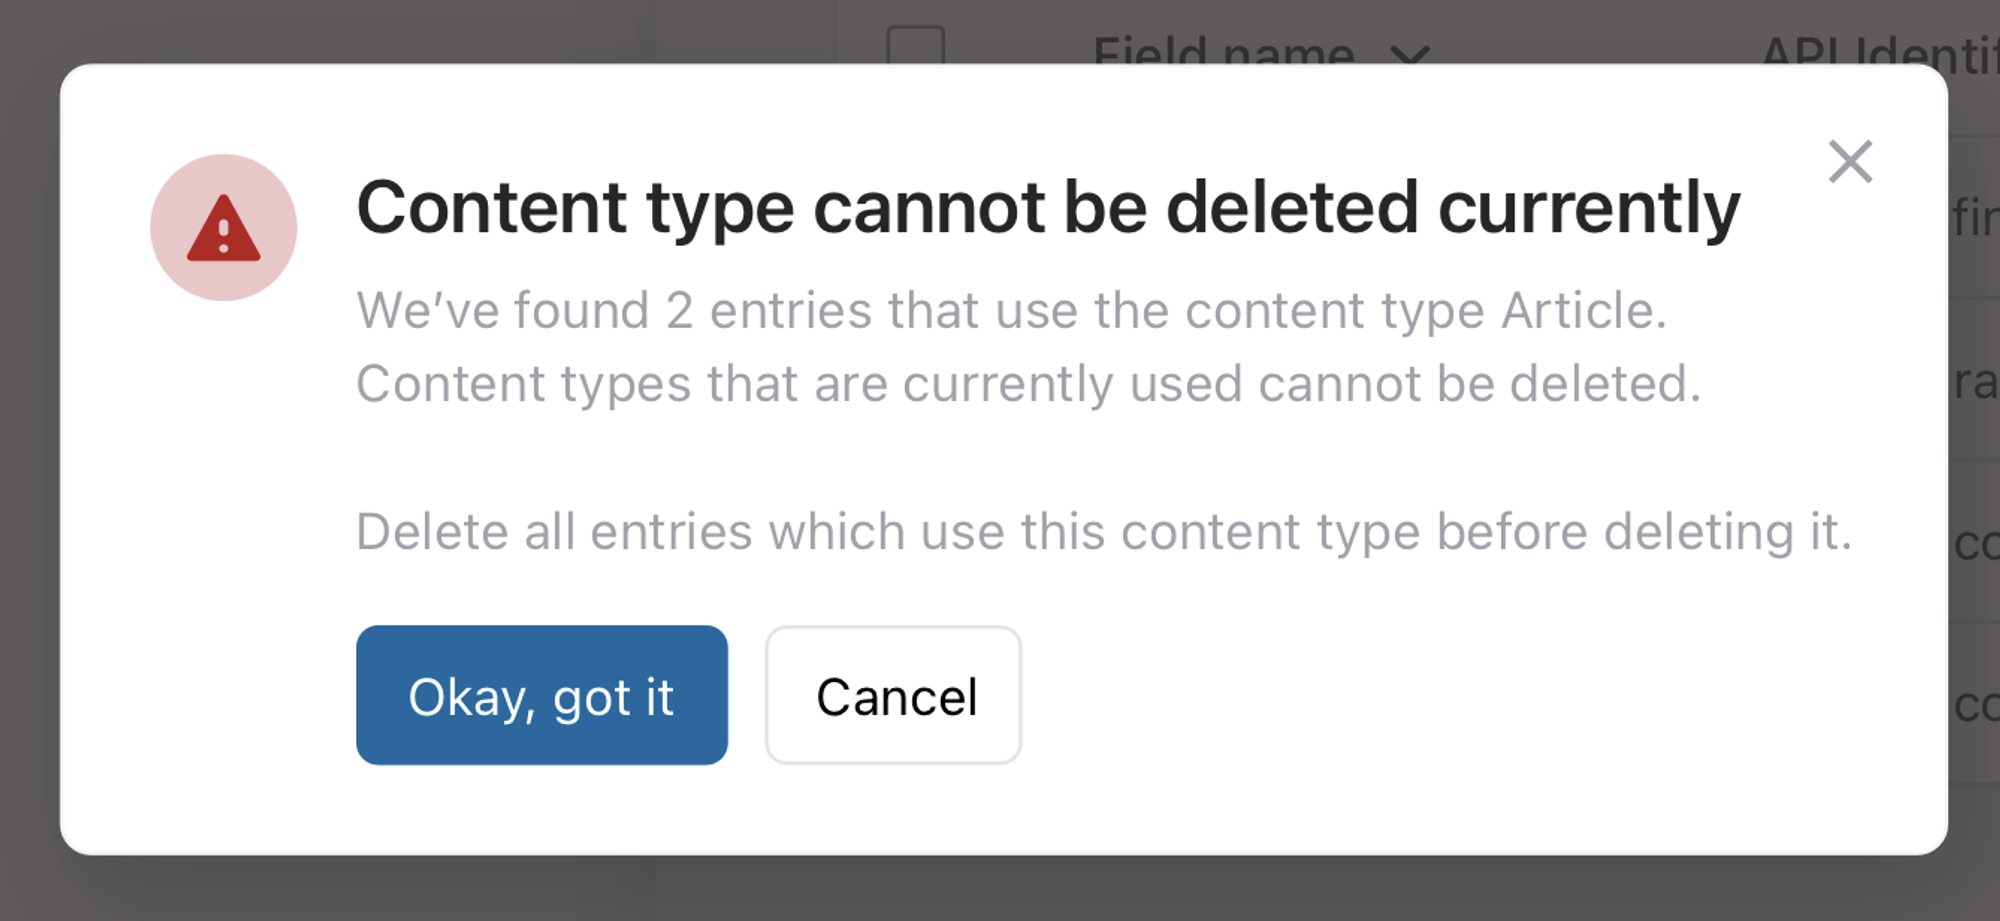
After getting rid of all entries of that content type, including archived items, you can completely delete that type of content.
Managing fields: turning off & deleting
Changing your content model by adding or taking away parts is easy. New fields will show up in what you already have. If a new field is needed, you must fill it in before sharing it again, but old articles stay up until you update it.
Disabling fields in response
Disabling fields in API response means they won't be fetched by the Content Delivery API and won't show up in your final project, but you can still change them in the editor. This is for parts that are only important in the Storipress web app, like the status of an entry in the workflow. Not having this info in the API response makes getting the data more efficient.
Deleting fields
Before you remove a field, turn it off in the API response and see what happens. This stops you from accidentally deleting something important for your final project. Always check the API responses before you finalize deleting a field!
Getting support
Content modeling can be big and tricky, so it's okay if you're still figuring it out. This guide is just the start. If you need more help, chat with us or ask for support; we'll be there!
Last updated on February 3, 2023